Sunday, August 21, 2016

Egg Hatch - Part 3

Wow! I just realized that I never shared with you how our egg hatch ended! It was amazing!!! All of our 6 eggs hatched. We got to see about half of the chicks actually do most of their hatching. It's hard to be patient, but you have to let the chicks come out in their own time so that they can gain strength.


When they were finally all born and we
could put them in their new home.

The farmer was able to help me
identify the sex of the chicks.
 The reddish yellow ones were the girls.
 The totally yellow chicks are boys.
 Of the two black chicks, one was
 a boy and one was a girl.
The way to tell them apart was a little
 more difficult. We had to wait
 a few days to see which ones/if
 they would get white spots.
 I believe that white spots meant
 we had a boy. We had one of each though.


This little gal had me worried. She wasn't
growing as well as the others
 and they were beating to the food.
 We decided to put her in her own
 are with her own food. The farmers
 told us that giving them scrambled
eggs helped a lot. That seems so wrong!

After they were all hatched and happy. They stayed with us for 2 weeks. During that time, they were pretty quiet when they were warm. Eventually, they all go pretty big (as you can see in the last video) and they were starting to get loud and a little stinky! As much as I enjoyed having them, they were certainly getting to be too much for us. We knew they were ready to roam free more than we could offer. I was happy to hear from the farmer that all of our chicks were sold within a week of our returning them. I was happy to know that we did a great job getting them to the point where they could be sold.

In case you're wondering, I absolutely LOVED this project! I wasn't sure if I would....I am NOT an animal person. I don't understand animals. I've really never had pets in my life. So this was a whole new thing for me. Thankfully, I had some help to get started and truthfully, it's easier than I'd ever imagine. I hope that you will consider doing a hatch of your own! If you do, don't forget to visit my store WeddedMommyBliss, to pick up your hatching journal. It will help you out and be fun for your kids.

To find the start of this hatching project, click Hatching Eggs Part 1

Saturday, July 23, 2016

Creating a Homeschool Budget

If you haven't read "Let's Get Started", start there!

Welcome back to my series that is helping you get started on homeschooling. This series, along with my new Homeschool Planner Plus, will help you get started and organized so that you can homeschool your family.

If you have been wondering why I'm calling it the Homeschool Planner PLUS, the PLUS has to do with the extra information that I have added to the planner. There are many pages of organization, but there are also pages where I give you some tips. Most of these tips are just based on mistakes and trials that I have had over the past few years. I feel that all of us homeschool parents are meant to help and encourage each other, so I want to share my wisdom and hopefully help you!

Today, I'm going to share some information about homeschool budgets.

Here is a look at my budget for this year. As you can see, I have yet to total it up. Thankfully, I do not need many things for this year, but if you are just starting out, you might want and need more than you are comfortable purchasing all at once. Here are some thoughts on budgeting for homeschool that may help:

1. Make a note of things that need to be paid for now and things that can wait. 
In the above picture, you can see that my first two items are swim lessons for my children. $240 for swim lessons is not in our budget in September! Luckily, this includes what I will spend for the whole year and $120 will be all that I spend in September. The other $120 will not be needed until March or April. If you really cannot afford activities for your kids, but want them to have the opportunity to join group activities, consider asking for things like homeschool swim lessons, karate or dance classes for Christmas or birthdays.

2. Shop the off season!!!
Aside from lessons, remember that you may not need to buy ALL of your curriculum books right now. See on my list where I wrote "Explode the Code #4". I wrote that down in March. As it turned out Christianbooks.com had a sale in the spring and I was able to get many of the "Explode the Code" books for $4 and under! There are many ways to save on curriculum, but checking out the homeschool websites between October and April can save you some real money!

3. Only buy what you need.
The next item on my list is printer ink. I hate that I need to put that on my list, but I use my printer often for school and nothing is worse then when I have no ink! When I wrote it down, I was expecting to pay $75. That was because I thought I was going to buy one of the sets of ink that has all of the colors and black. As it turned out, I have been very conservative with my color ink, so I decided to buy just the black ink. Also make a note, my printer ink has the option of buying longer lasting ink. This kind of ink has whatever the number is for your ink cartridge with the letters XL after it. These may cost more, but the once that I used will provide more than double the pages for a cost that is NOT double the price!!!

4. Keep your eyes open.
One of my most favorite things about summer in Pittsburgh are the church rummage sales! I have found so many gems for next to nothing! You can see that next on my list are the math books that I need for my son and the handwriting books that I need for my daughter. My eyes are wide open looking for these items! I will also be scouting ebay to see if I find them. Typically, what I find at the church rummage sales are math manipulatives. I have been lucky enough to actually go to sales where they are doing "everything you can fit in a box for $5" and find classes sets of stuff like tangrams and puzzles to go with them. That's like finding gold!!! I always grab up that stuff and I share with whoever can use it.

5. Freebies!!!!!
One thing that I planned to have on my list, but no longer need is Science curriculum for this year. I had made my mind up about what I was going to use, but did not purchase...I REALLY like to wait and not jump the gun. Well, patience paid off! A friend of mine is still new to selling Usborne Books. She asked me to host an online party and I told her that I would try my best. As it turned out, the party went insanely well! I received over $150 in free books and Usborne happens to have some great Science books, so I'm going to use what I got from there for Science this year. Here are some examples of Usborne books that I already own (my new books haven't arrived yet). Nothing is better than free!! Consider having your own Usborne party and you can also receive free books or you can order right from the site. This link, will take you to the site of the friend that was the consultant for my party. Lauren is also homeschool mom and would love the business.
Isn't this cover beautiful? The pictures
inside are just as wonderful!!!
This book may look familiar if you saw
 the post on our egg hatch. I was in love with
 this book, so I bought it!!
6. Buy your school supplies with the rest of the back to schoolers or shortly after they go back to school.
Although you may not need tons of school supplies, if you even need a few, back to school is the best time to buy. Even if you overbuy, I'm sure you will not be sorry! If you don't believe me, wait until October to buy a pack of Crayola markers. The price will no doubt be $3.97 or thereabout for 8 markers!!! That same pack of markers will be around a dollar during back to school. I usually buy 2 or 3 packs of markers and crayons per child for school. This allows me to get rid of ones that aren't working or crayons that have broken and start new midyear. I also use back to school time to load up on super cheap, like penny deals at CERTAIN office supply stores for things like "stuff a bus" donations. One year, our church was asking for donations of backpacks filled with school supplies for children in need. I was able to buy a backpack and fill it with supplies for less than $10.

Well.....get started on that budget!!! For more help on getting started with homeschooling, stay tuned!!

Friday, July 22, 2016

Let's get started...


       Yesterday I was so excited to tell you about my new "Homeschool Planner Plus". Today, I'm sharing some of information about what you need to do to get ready for the year and how you can use this planner to help you.
      The first thing that you will want to do when you decide to homeschool make a list of things that you need to do. However, that's tough when you don't know what to do! I put together a list for you and it's available as a checklist in the planner.
       The first item on the list is reviewing the homeschool laws for your state. Every state will have their own set of rules. Some states do not require you to do anything to check in. To find the rules for your state, search for the name of your state followed by the words "department of education". 
     
      In Pennsylvania, children do not need to officially be registered with the local school district until the age of 8 (that applies to all areas except Philadelphia and there are a few other exceptions....see Pennsylvania Department of Education for more on this). At that time, if you are planning to homeschool your child, you should right up an affidavit, have it notarized, and deliver the affidavit to your local school district's administration office. It is highly recommended that you hand deliver this if possible and get a receipt or some notification that it was received by the school. If you mail the affidavit, make sure that it is sent certified mail.
      During your school year, there are just a few things that you should be doing to prepare for the end of the year. 
            1. Keep a log of the days that you are schooling
            2. Keep a log of books that you use for school
            3. Determine if your child needs to take a standardized test and research that EARLY
            4. Keep some sample of what you child is doing in an envelope or binder
            5. Find an evaluator for the end of the year


Well, researching the rules for your state can be overwhelming, so I'm going to stop here and let you catch up!!!
**Please note that the above rules for PA are a quick summary. There are many exceptions that you should read about and learn on the Pennsylvania Department of Education website

Next up....Creating your homeschool budget!

Thursday, July 21, 2016

Homeschool Planner Plus!!!

I've been so working on this in my mind for over a year!!! I'm excited to share that I have a great series coming up to help families that are new to homeschooling!!!

If you are ready to learn more, download my new product called "Homeschool Planner Plus".

There is lots of great information in this product, but some additional help if you are a homeschooler in Pennsylvania....since I happen to also be! 

Wednesday, February 10, 2016

Hatching Chicks - Part 2

Today is day 10 of our hatching project! I want so badly to have something to share with you, but taking pictures of these eggs is very difficult!! Here is what I do have...

 This video will (hopefully) show you some of the veins that we can see when we "candle" the eggs.
This is the one picture that I got that showed anything. See that light spot on the bottom of the egg? That is the sac of air that the baby chicks will take their first breaths from! Each egg has a nice air sac.

That's as "eggciting" as things are getting around here. We have about 10 more days until hatch day! We are excited to see which egg will hatch first!

Click here to go to my teacherspayteachers.com store and purchase my "Hatching Eggs" activity pack.

Click here for: Hatching Chicks - Part 1
Click here for: Hatching Chicks - Part 3

Tuesday, February 2, 2016

Hatching Chicks - Part 1

Have you ever been so nervous about something that you create your own obstacles to keep yourself from feeling guilty about not doing "the thing".

I have been tossing around the idea of hatching baby chicks with my children for a couple of years. I learned about this farm that is about an hour away from us and they give you everything you need to do the entire project! They even let you bring the chicks back when you're done, which is just the right amount of commitment for me!

After coming up with a couple years worth of reasons to not do this project, I finally jumped in with both feet and scheduled a day to pick up everything and visit the farm.

Prior to going, I searched TeachersPayTeachers.com to see if I could find any resources that would go along with this project. I did not find anything that I felt was really good, so this has also turned into a working project for me.

How about some pictures?
 
This is the bin (which will become a brooder) that we picked up from the farm. They included all of the supplies in here. We HAD already started to unpack it.....we couldn't WAIT to get started!
Here are the rest of the supplies that came in the bin. This is the incubator, eggs, and the "candle" (aka...led flashlight for looking at the eggs as they grow)
 These books also came in our bin. They are amazing when it comes to explaining what is happening with our eggs.

We were told to let our eggs settle for a few hours from the drive home. The farmer also said that we could write on the eggs if we wanted to name them. We couldn't resist! Introducing.......

 DADDY
 EGGLET
 MAX JR
 ISABELLA
 and LUCY
(We also have Chicklet....he seems to be MIA, but he's here)
Once everyone was named. We put the eggs into the incubator and we were off!
The next day.....

I wish I had a picture of my daughter when she got up and realized that there were not any baby chicks yet. This will certainly be a good lesson in patience for her.
At this point, I had started on my egg hatching activity for my store Wedded Mommy Bliss. The first activity was to look at the eggs and just color the 7 eggs to look like the eggs that we had. We also answered questions about what we felt and smelled. I loved that my son said that it smelled like scrambled eggs in the incubator.
 On the left, my son only wanted to color "his" eggs.My daughter and I worked on the right side. You can see the big black "X"....I did that, because we lost "Snowball" (yes, he didn't even get pictured above...) before we ever even got started.
Here are our eggs, just keeping warm!
This project will continue until the end of February. Please check back to see how we are doing and when our baby chicks hatch!!

Also, please visit Wedded Mommy Bliss to find my egg hatching activity. Likely it will be finished well before the eggs are hatched! 
Click here for: Hatching Chicks - Part 2
Click here for: Hatching Chicks - Part 3

Sunday, December 6, 2015

Making Algebra Fun!!!


Hey Friends,

I love to challenge myself! So when I had this idea to make an algebra activity for my Teachers Pay Teachers store, I had to run with it!

If you've read my blog, you probably can tell that most of my work has been in the field of elementary education. I got to peek out of that for one year while I was teaching English as a Second Language to students at all grade levels. I was scared when I started, but I loved that job!

Back to my idea...

I wanted to make a fun algebra puzzle that was something that a teacher might use the day before a holiday vacation or maybe on a snow day that turned into a half day. However it worked out, I wanted this to be something that would be different than sitting and taking notes, but also allow students to get some practice in solving algebra problems.

The resulting puzzle was my "Thanksgiving Algebra Puzzle" which seemed to sell pretty well in my store. I decided to run with the idea and also made "Christmas Algebra Puzzle" which is now available in my store. If you're curious as to what these puzzles really look like, you can download my FREE Hanukkah puzzle. The Hanukkah puzzle turned out to be about half the size of my normal puzzles, so I decided to make it a freebie.

I have not received much feedback yet on these puzzles, so if you download them from my store and use them in your classroom, I would LOVE LOVE LOVE to hear how it goes! Also, I am already working on a Snow/January Puzzle, so expect that there will be more to come!

Wednesday, November 11, 2015

Graditude!

I love this time of year! There are so many wonderfully fun things going on! Are you remembering to give back to others?

I saw a funny cartoon the other day. It said, "Black Friday. The day when everyone nearly kills each other for cheap stuff, just the day after being thankful for all that they have!" That made me chuckle and also really consider the things that we do during this season. Are you remembering to show gratitude?

Thanksgiving is just about two weeks away. We are plugging along with our Thanksgiving Turkey of Thankfulness.

We are also working on a Gingerbread house which we make as a family and then drive downtown to be part of the Gingerbread display. We have been taking part in this tradition since the year that my son was born.

One year, I made a Turkey cake and delivered it to local firefighters and policemen in our town.

We will also be filling shoeboxes next week for Samaritan's Purse. We have also done this for a couple of years now.

It is so important to me that my children learn to give. What are some ways that you are showing people that you love, care, and appreciate them this season?

Friday, November 6, 2015

Roll it, Read it!

I created this last year for Matthew. He was really starting to take an interest in reading and writing, so we abandoned the short vowels and skipped ahead to "The H Brothers". These are the words that start with ch-, sh-, th-, and wh- and there's an awesome story that helps bring this to life (google it!).

The game has minimal prep.
~I prefer to laminate our board. You will need one per person.
~You will also need to prepare one die for each pair or group that will be playing.
~One dry erase marker per person.

In the game, you simply roll a die, whatever number you roll is the number that you read. Each number has 4 sentences, when you read one, you mark a box beside the one that you read to show that you were successful in reading it. Unless you roll a 6, then you get to choose any of the numbers and read any one sentence from anywhere on the page. The player that reads all four sentences by any one number is the winner!

Matthew loves to play this game!

This product is on my Teachers Pay Teachers store: Wedded Mommy Bliss right now! I expended it to allow for a variety of levels to use it. At the beginner level, students simply have to identify uppercase letters. As students progress is their reading, they can move through short vowel families, long vowels, and then on to reading sentences.

Thursday, November 5, 2015

Voting for Favorite Foods!!!

Do you kids like to write? Mine really does! He loves writing in notebooks about whatever is on his mind. Writing with a predetermined focus is more difficult, but it must be done!
Today, we used the voting themed writing prompt from my November Story Starters, (aka Writing Prompts) to write about Matthew's favorite food.
 Matthew has a difficult time choosing just one thing that he likes most of the time. I stopped trying to force him to pick a favorite a long time ago, so I was not surprised when I asked him to draw his favorite food, there were three different foods: candy, waffles, and ice cream. Well, actually, I was shocked that pizza didn't make the list! We started off by drawing his favorite food and coloring it. I personally feel that it is easier to write about something when you can really visualize what you are writing about.
After he drew and colored his "Rainbow Candy". We went up to the question and finished the sentence. He thought he was getting off easy, because he just wrote "Rainbow Candy" and assumed he was done. I told him that he had to also add a reason for why he liked Rainbow Candy the most. He said "Because I like rainbows." After he finished, we did some editing. We talked about "rainbow" being a compound word, any time "I" is used as a word it is capital, and we talked about punctuation. Actually, he remembered to put a period at the end, so I circled it, just to let him know that I noticed it. To be "age appropriate" I did not throw in his face that a sentence could not start with "because", instead I just pretended that it could and showed him how it would be capitalized.
I think you can expect to see more writing prompts being used at our homeschool table over the next few months!

Wednesday, November 4, 2015

We are thankful for.....

I realized this morning that it was already November 4th and I haven't put up our turkey and started added feathers!  I decided this year that I wanted to print, laminate, and use my new product!!! 
This product is called "We Are Thankful For..." and it is available in my store for $2!!! I printed out the body and about a dozen feathers.
 This is my lamination station happening right on the kitchen counter! I love watching this thing work! It's great to laminate things like this, because I know that my family will continue to use them. It is very important to me that my children grow to understand gratitude.
After I laminated and cut out the body and feathers, I asked my son what he was thankful for. He said, "this whole family! I wouldn't be alive without them!" That's just so sweet! All through the month, this turkey will continue to get new feathers with things that my children are thankful for. I love, love, love watching the turkey get all of his feathers! I hope you enjoy it too!

Monday, November 2, 2015

Planning Playtime

I had the pleasure of reviewing an awesome product today!

Today I downloaded "1st Grade Math and Literacy Bundle - November" from Amy who owns "Planning Playtime" on Teachers Pay Teachers. Basically, Amy just asked me for some feedback on her product, but I liked it so much that I wanted to share it with you. 

This bundle has 23 pages to it and they are beautifully done! The math pages include: single digit addition, subtraction, more and less (fill in a number that is 1 more than the one given and then also l less), addition word problems, an addition dice game, counting by 2s and 5s, odd and even, and recognizing numbers in word form. The literacy pages include: word practice, reading sentences to determine if they are true or false, beginning sounds, word family discrimination, color by word family, and three writing prompts related to Thanksgiving.

My excitement for these pages led me to immediately print them and get my son to work on some schooling for the day. 

 This is Matthew working on the counting by 5s page. I liked that there were a few written in so that he did not get too lost when counting by 5s. His number writing still is not that great, so it really takes him some time to think about what he has to do to make each of the numbers. Halfway through, I thought it would be best to write the numbers 1-9 at the top of the page just so that he could focus his attention on the task that was intended and not so much on trying to recall the formation of numbers.
This addition sheet was nice as well. He counted the different pictures to determine the addends and then wrote the sums. You can see on this page where I wrote the numbers again. This practice was much needed!

Amy has many more wonderful products for students in PreK-5th grade, so please click over and check her store out!

 Planning Playtime

The during and after....

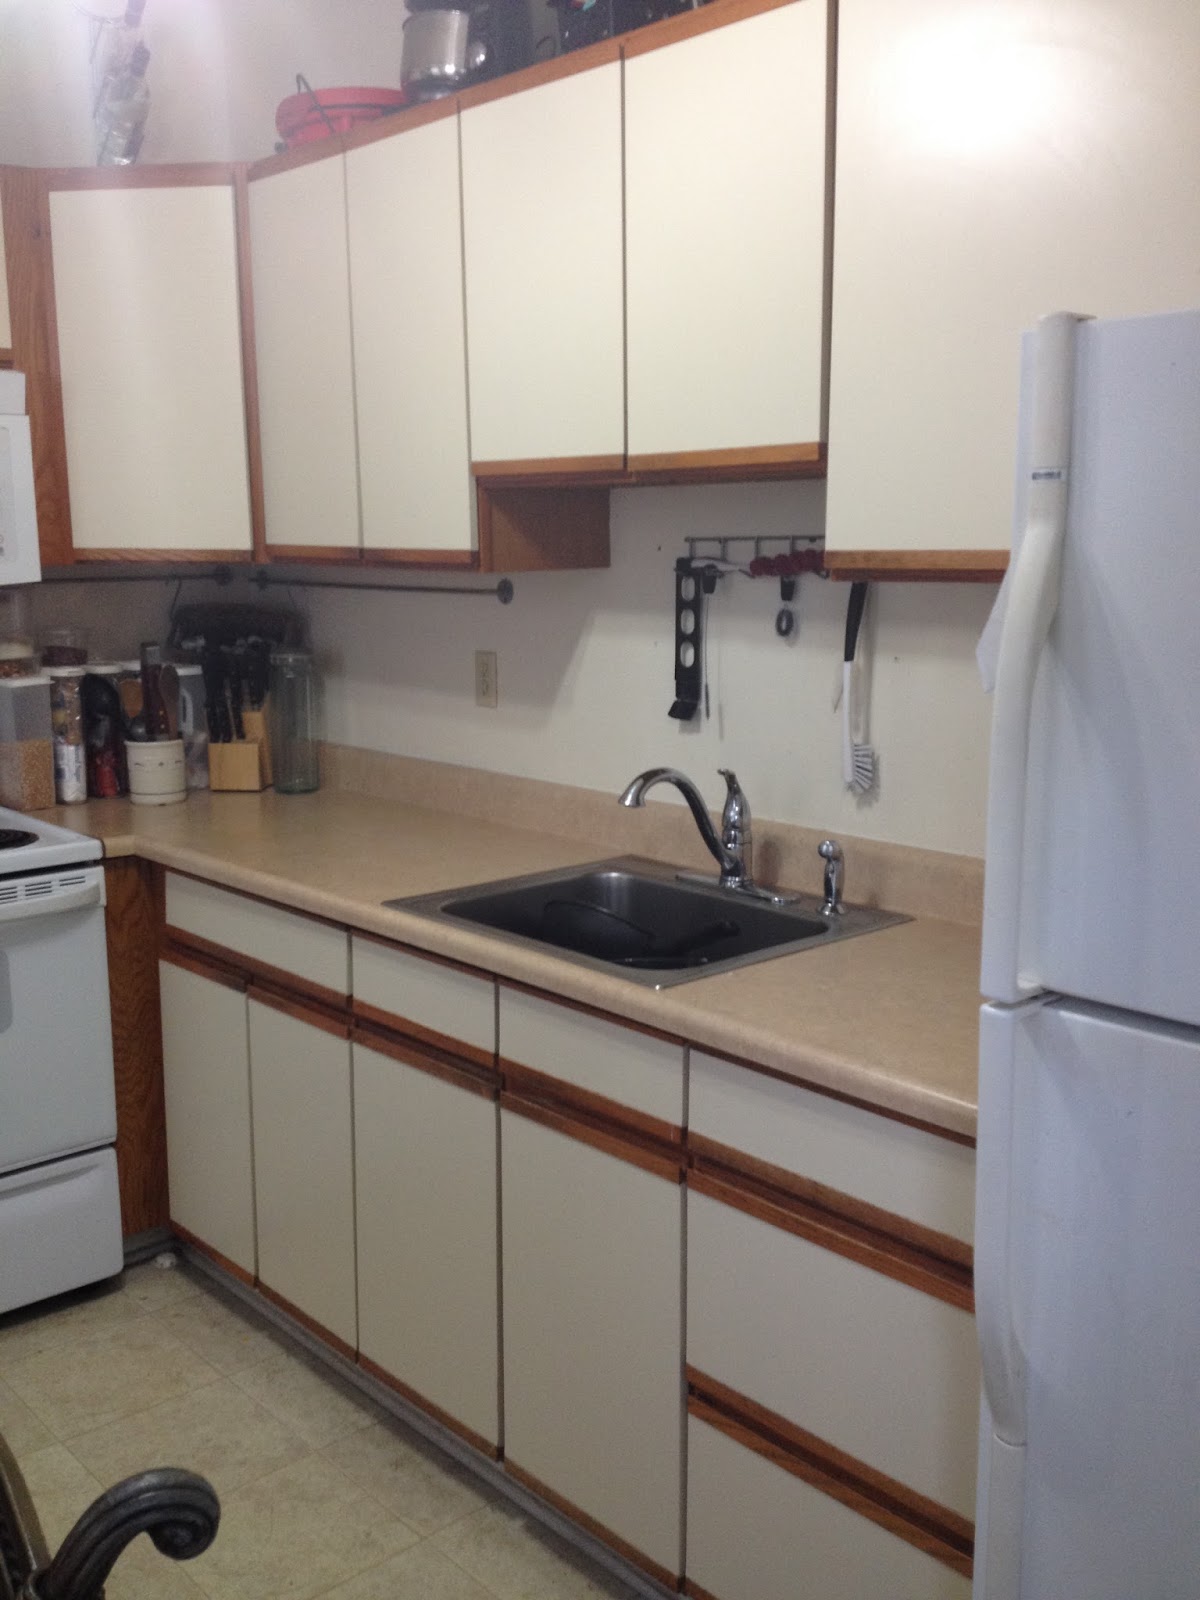
You asked, and I was listening! I finally got all of these pictures together to show you how things turned out in our kitchen! Enjoy!
 
These are the rooms that we started with. A small kitchen and a playroom that I had already removed most of the toys from.
 
Then we demoed one side at a time. You can see....we were all the way down to the old original bare walls.
 
This floors has always been a bit of a disaster. This section of the house used to be a sunroom or something so the way that the floor was put in was kind of a mess. We decided to fix that as much as we could while we were tearing it all up.
We also tore down the wall between the rooms so that it could all be one big kitchen.
 
The day that drywall went up and the dust was back down to a minimum, that's when we started to feel like there might be an end to all of this craziness!
 
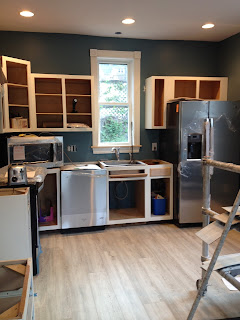
Here's the wall color on the walls and the cabinets before they were painted.
 
Then appliances got here! And things really started to look finished! BUT the plumbing wasn't set up yet so we still had waiting!
 All finished! Everyone loves this room, so you'll notice that my daughter was loading up her toys on the floor


This is my favorite spot!! I love to be here!

And here's the man that I can thank for heading up this project! Thanks Dad! You deserve all of the kisses and hugs for this one!

Sunday, November 1, 2015

Road to Speech

I've been on a journey lately, trying out a new way to share my teaching resources through my Teachers Pay Teachers store. While working to make connections with other sellers, I joined a group of newbie teacher authors on Facebook. Our goal is to help support each other and share knowledge. One of the ways that we are encouraging and supporting each other, is taking one day a week to review and make suggestions for another teacher author in our group.

This week, I am learning a bit about Speech Therapy while visiting the store: Road to Speech. The owner of this store, Marisha, has a Master's of Speech Language Pathology from the University of Washington. Marisha's store, includes Speech materials for grades PreK-6. There are articulation stickers, visuals for teaching grammar, themed sticker activities, and so much more.

After my visit to the store, I decided to check out the Road to Speech blog. What I loved about the blog was that it showed the products from the store in use! This post caught my eye, because I had just downloaded the product that was used in the picture of her last blog post. The product was for goal setting, which is a skill that I practice with my own children at home, because I feel that it is so important.

I hope that you will take minute to two to visit the Road to Speech store and blog. When you do, please share a comment about what you found to be helpful!


Wednesday, October 28, 2015

New products on Teachers Pay Teachers

Hi Friends!

I have been working so hard over the past month to get my Teachers Pay Teachers store up and running. I have posted over 20 products in about 28 days! I can't even believe it!

I would love for you to check out my store and give suggestions on what you like, don't like, want to see, or need to have.

I have loaded a few freebies in my store. Please enjoy!

Friday, October 9, 2015

Another new adventure....

I used to be a classroom teacher.

I wanted to be a teacher since as early as I can remember.

I adored my teachers!

Now, I'm a mom and a homeschool mom at that! I wear many different hats, but about a week ago, I put on a new one....

BUSINESS WOMAN!

I decided to open up a Teacher Pay Teachers store. The site allows teachers to post worksheets and activities that they've created so that other teachers, parents, homeschoolers, and anyone else can purchase their items.

I am only a week in and I'm very anxious to make my first sale, gain followers, and receive feedback. I would love it if you could take a few minutes to look at my store. I have a number of free products that you can download and use right now!

Wish me luck on this new adventure!!!

Sunday, February 15, 2015

Mario brothers blanket

For Christmas, I made my awesome, game loving husband a quilt. It took me almost three months, but his Mario blanket got finished! Here's just a few pictures of the process.

The most exhausting part of this quilt was cutting all of the squares. It was 15x20 squares, so that's 300 little squares. I've never attempted a quilt before, so starting out, my first thought was that I could cut everything like they did "back in the day". After about 10 squares, I gave in and bought a roller cutter. Things improved quickly!!

I took these pictures of the fabric that I bought and planned to use, because there's nothing worse than starting a project and trying to recall what was bought. I tried to gauge how much of each color that I would need by how often it was used in the quilt, but I did not do the math to figure out exactly how many yards I would need. I also may have forgot to mention that this quilt did not come with a pattern, par say. I simply found a picture on Google of a pixel Mario and followed the squares.

If I had to guess, my order probably looked like this
1/2 yard of black
1/4 yard of yellow
3/4 yard of brown
1 yard of the off white
1 yard of the dark blue
1 yard of red
2-3 yards of light blue

However, I do believe that I did need to go back out and purchase more of the light blue, so my initial order may have been more like 1-2 yards.

As I said, I cut out all of those squares and then I just started pinning and sewing rows together. It I followed my little pixel picture and checked everything multiple times to make sure I didn't sew anything out of order. After a row of squares were sewn to each other, I just added them on to the quilt (I started at the bottom and went up from there)


This picture show how Mario looked when he was all pieced together. I felt pretty awesome when I got to this point, and did not realize how much more work I still had to do to attach the batting and the back.

I used red flannel for the back and I took Mario with me to the fabric store so that I didn't have to buy any more fabric than what I needed.

Once I had the middle and back laid out, I started in the middle of Mario's red shirt and started pinning him with quilting safety pins. I pinned about 40 squares at a time and then I had to sew around each square so that all of the layer would be tied together.


This project started around October and I worked on and off through January to finish it.

After I finished this one, I realized that I was going to be hooked on quilting! So, I bought some material to make a few baby rag quilts. Thank goodness those move along much quicker! I finished one in 2 or 3 weeks working on it very little. Perhaps you'd like to see it?